OAuth 2.0 Authentication
This documentation describes how to implement OAuth 2.0 to integrate your application with Growave. OAuth 2.0 allows users to authorize your application to access their Growave data without sharing their login credentials.
Before you begin
Before starting the integration, you need to register your application with Growave. To do this, contact our team and provide the following information:
- Name — the name of your application that will be displayed to users.
- Logo — your application's logo image, which must be in SVG format and no larger than 5MB.
- Redirect URIs — one or more URLs where Growave redirects users after authorization and which are also used for OAuth validation.
After registration, you will receive:
- Client ID — a unique identifier used to publicly identify and authenticate your application.
- Client Secret — a secret key used for app authentication. It must be kept secure and treated as a password; exposing it in a public repository or client-side code will compromise your application's security.
OAuth 2.0 authorization flow overview
When users connect your application with their Growave account, they authorize your app to access their data through our APIs. This authorization process uses OAuth 2.0 with the Authorization Code Flow and PKCE (Proof Key for Code Exchange) extension for enhanced security. Upon successful authorization, your application receives access tokens that authenticate all subsequent API requests.
Construct the integration URL
The integration URL starts the OAuth 2.0 authorization flow for users to connect your application with their Growave account. When you redirect users to this URL, they'll authenticate with Shopify and review the permissions your app requests. Users can review these permissions and decide whether to grant or deny access to your application.
Redirect the user to the authorization flow by constructing the following URL:
https:///auth-service/v1/oauth/authorize
?response_type=code
&client_id={client_id}
&scope={scope}
&redirect_uri={redirect_uri}
&code_challenge={code_challenge}
&code_challenge_method=S256
&state={state}
The URL contains the following query parameters:
| Query parameter | Description |
|---|---|
| response_type | Must be code. |
| client_id | The client ID of your app. |
| scope | A space-separated list of scopes corresponding to the list of permissions that will be displayed during the authorization process for approval. (see Available Scopes). Example: scope=write_review read_wishlist. |
| redirect_uri | The URL where the user will be redirected after authorization. This value must exactly match one of your registered Redirect URIs. |
| code_challenge_method | The method used to generate the challenge. Must be S256. |
| code_challenge | Cryptographically random string generated by your client. It allows Growave to verify that the client exchanging the authorization code is the same one that initiated the request. This mechanism ensures that an authorization code cannot be intercepted and injected into a different session. |
| state (optional) | Growave includes this value as a query parameter in the redirect URI. You can use this field to track any information you need to track throughout the authorization process. |
Generate the code challenge and code verifier
To ensure a secure connection, Growave requires the use of PKCE, which involves generating a unique code_verifier and a code_challenge.
This mechanism provides an extra layer of protection by preventing authorization code interception attacks, ensuring that only your specific application can complete the login process.
| code_verifier | code_challenge |
|---|---|
| A high-entropy cryptographically random string with a length between 43 and 128 characters. It can contain letters, digits, hyphens, periods, underscores, and tildes. This value must be unique for every authorization request. | The result of hashing the code_verifier using the SHA-256 algorithm. |
The examples below show how to create the code_verifier and code_challenge:
- Python
- JavaScript
- PHP
import hashlib
import base64
import secrets

def generate_pkce():
  code_verifier = secrets.token_urlsafe(32)

  sha256_hash = hashlib
    .sha256(code_verifier.encode())
    .digest()

  code_challenge = base64
    .urlsafe_b64encode(sha256_hash)
    .rstrip('=')
    .decode('utf-8')

  return code_verifier, code_challenge
const crypto = require('crypto');

function generate_pkce() {
  const code_verifier = crypto
    .randomBytes(32)
    .toString('base64url');

  const code_challenge = crypto
    .createHash('sha256')
    .update(code_verifier)
    .digest('base64url');

  return { code_verifier, code_challenge };
}
function base64url_encode($data) {
  return rtrim(strtr(base64_encode($data), '+/', '-_'), '=');
}

function generate_pkce() {
  $code_verifier = base64url_encode(random_bytes(32));
  $sha256_hash = hash('sha256', $code_verifier, true);
  $code_challenge = base64url_encode($sha256_hash);

  return [
    'verifier' => $code_verifier,
    'challenge' => $code_challenge
  ];
}
You are required to generate a new code_challenge and code_verifier pair for your integration URL for every unique authorization request.
Example integration URL
Now that you've reviewed all the required parameters, the example below demonstrates a complete integration URL, including the PKCE code challenge and related values:
https:///auth-service/v1/oauth/authorize
?response_type=code
&client_id=your_client_id
&scope=read_customer write_wishlist read_review write_reward
&redirect_uri=https://your-website.com/oauth/callback
&code_challenge=ANYYL2JREWjvDTjYx_618iUQeNmhGesWyaarJ0f-876
&code_challenge_method=S256
&state=randomString
Request authorization
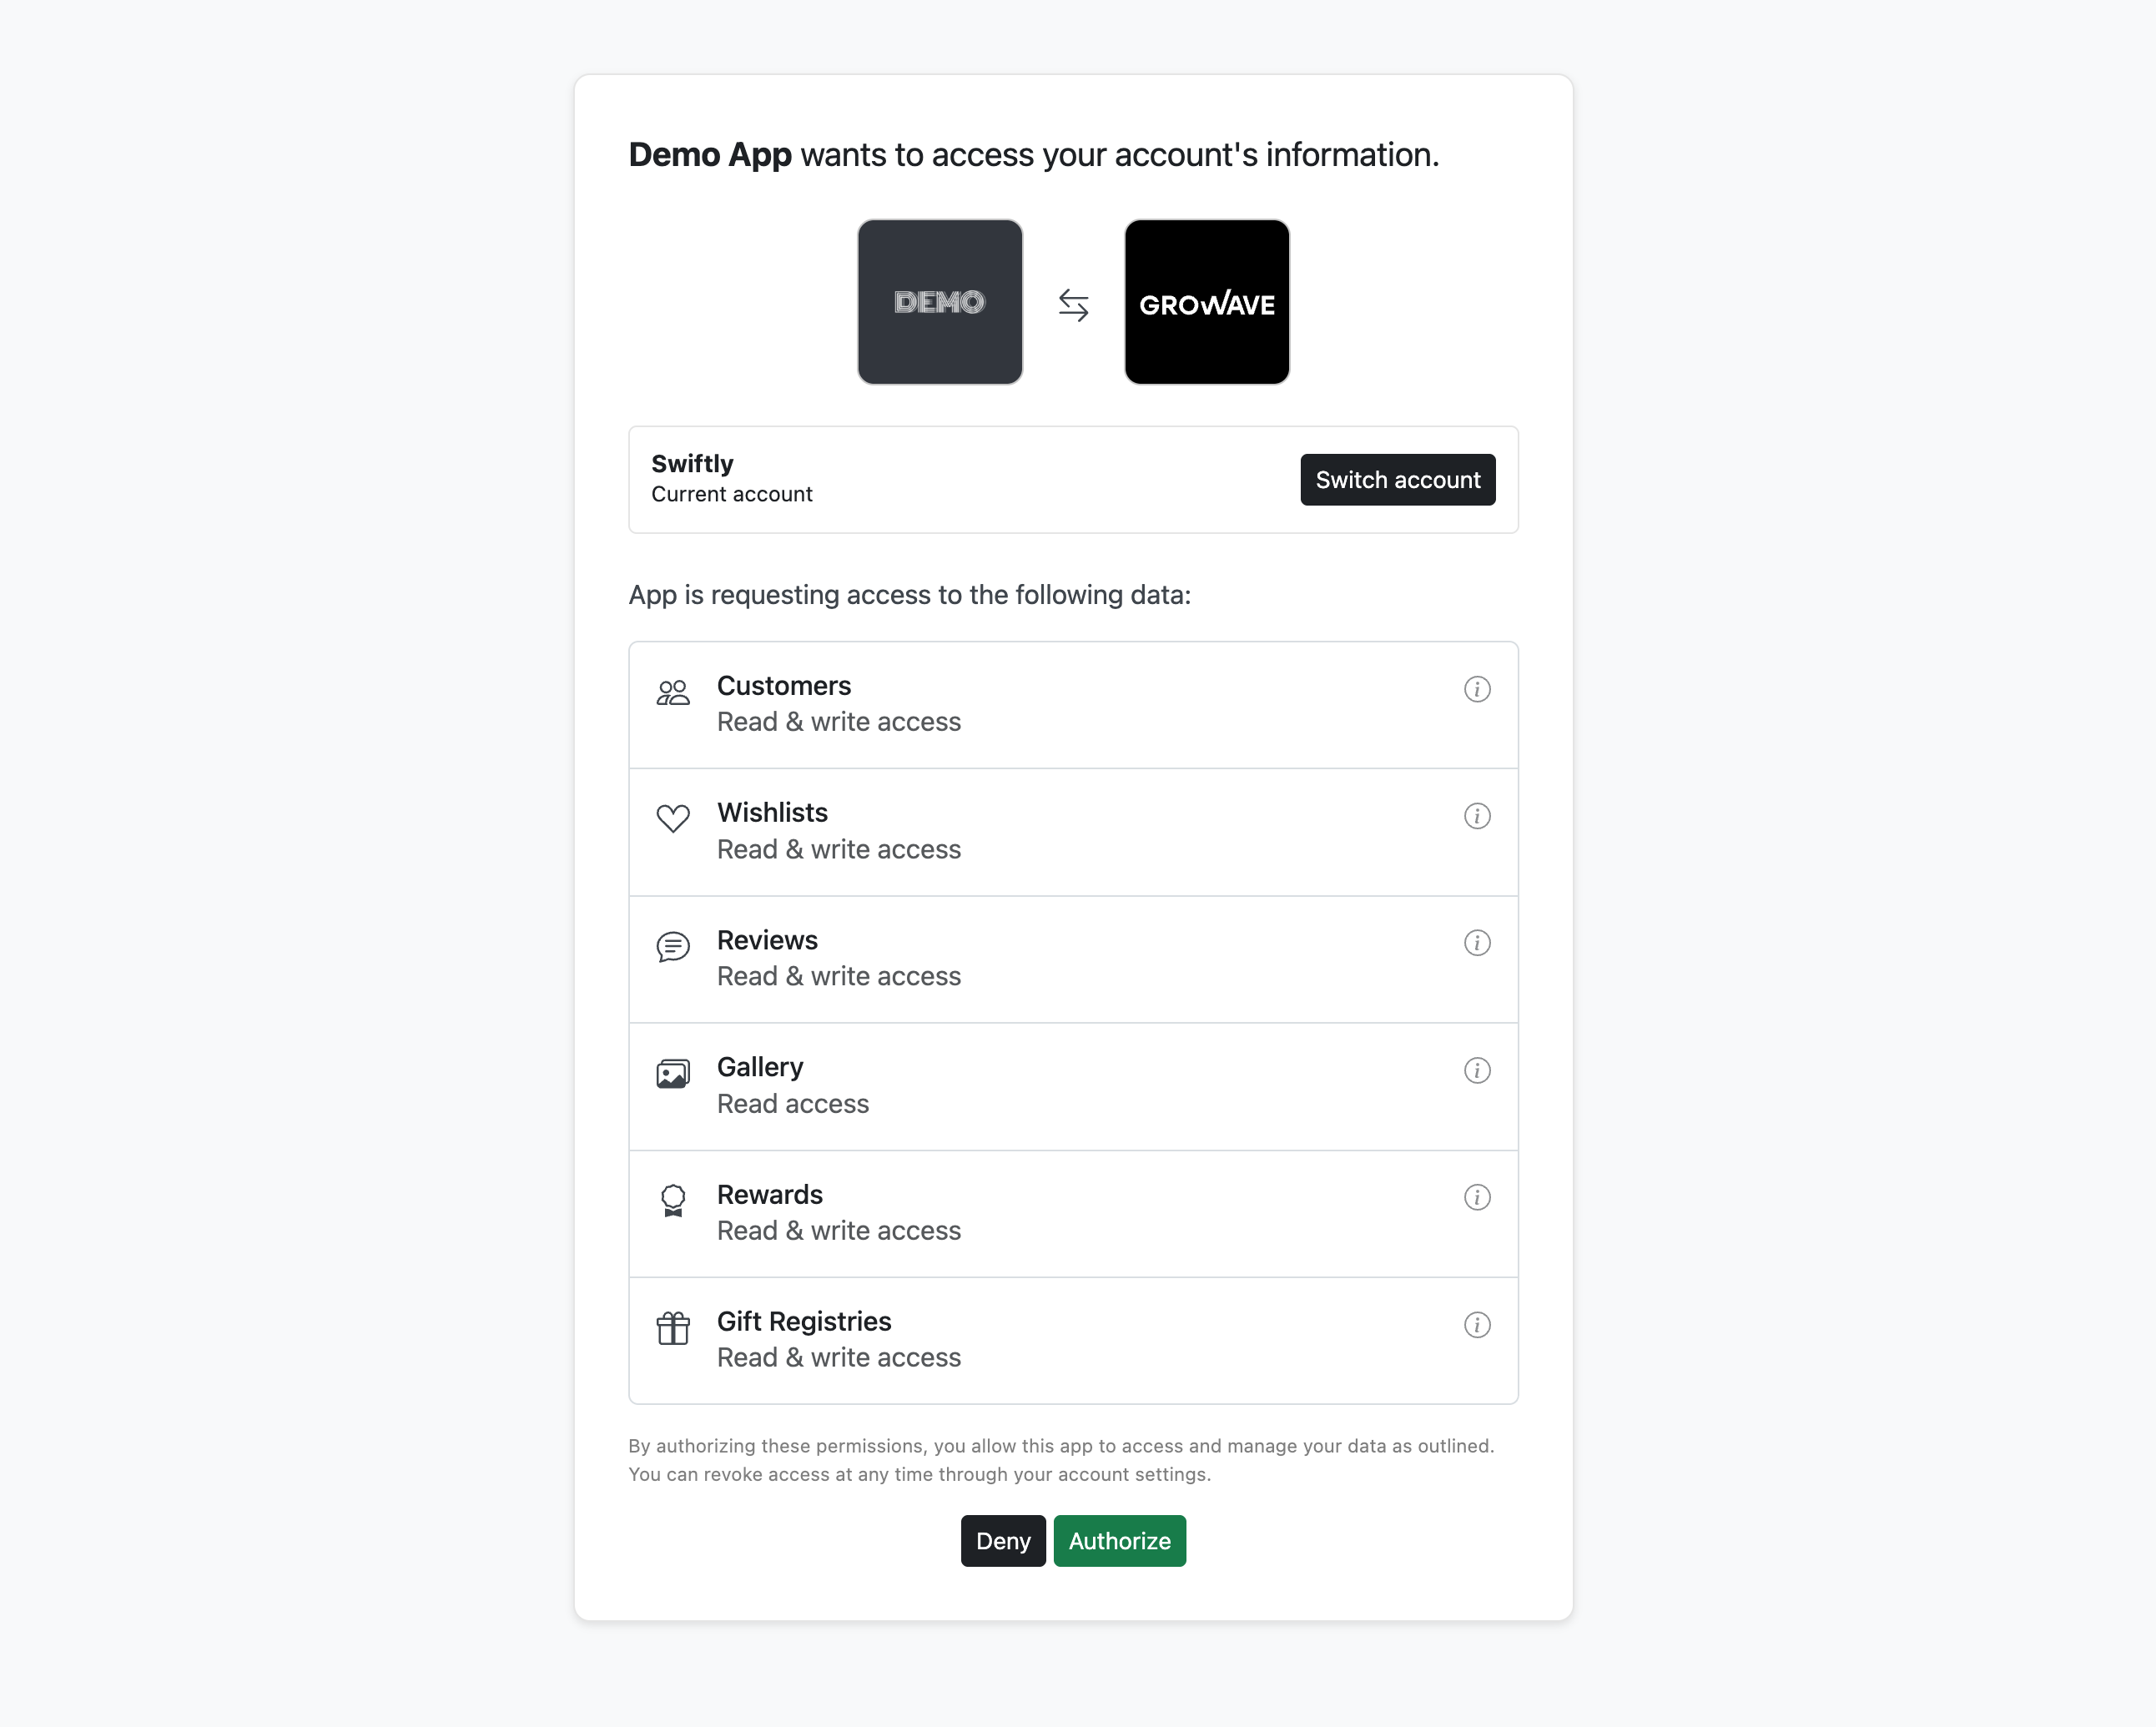
When the user is directed to the integration URL, they will see the consent screen with the permissions your app is requesting.
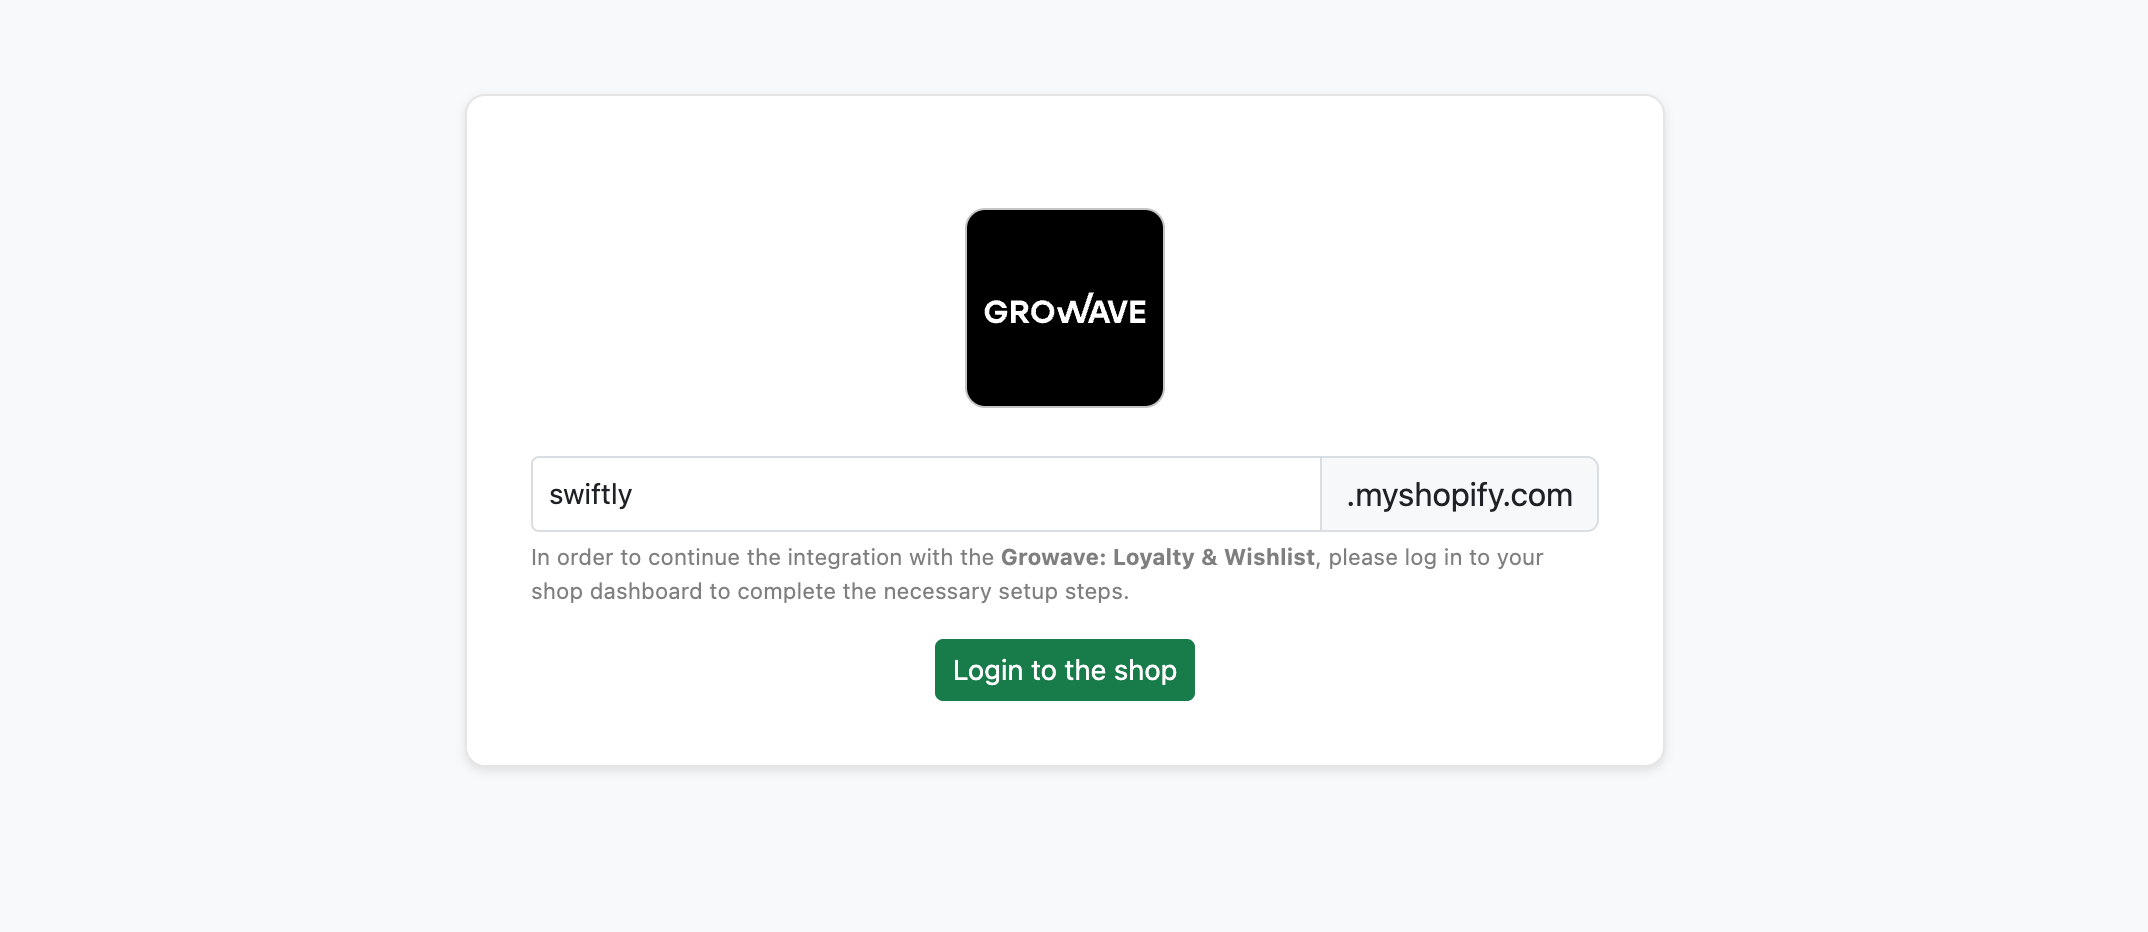
Please note that if a user is not currently logged into Shopify, they will be prompted to enter their store's domain name to proceed with the login process. This step ensures that Growave can correctly identify the store and securely link the application to the right account.
Authorization is allowed
When a user grants access, Growave redirects them to your specified redirect_uri with these parameters:
| Query parameter | Description |
|---|---|
| code | Authorization code to exchange for an access token. |
| state | Growave will return the exact same state value that was provided in your authorization request. However, if no state was included in your authorization request, it will not be present in the response. |
If there is an error, Growave follows the OAuth spec which defines the possible error responses.
The authorization code expires in 10 minutes. After it expires, your app should handle the integration error gracefully by showing a message informing the user that the session is no longer valid.
Authorization is denied
When the user denies authorization, Growave returns them to the redirect_uri with error and error_description parameters.
Use them to display custom messaging on your site.
| Query parameter | Description |
|---|---|
| error | Growave will return an error of access_denied |
| error_description | The message will be The+resource+owner+or+authorization+server+denied+the+request |
| state | Growave will return the exact same state value that was provided in your authorization request. However, if no state was included in your authorization request, it will not be present in the response. |
Exchange authorization code for access token
After the user authorizes your integration and you obtain an authorization code, perform a server-to-server request to exchange it for an access token using the Growave OAuth token endpoint:
https:///auth-service/v1/oauth/token
Structure your request with the request headers and body shown below:
| Request headers | Value |
|---|---|
| Authorization | Base64 encoded string that contains your client ID and client secret. The header must follow this format:Authorization: Basic <base64 encoded client_id:client_secret> |
| Content-Type | Set to application/x-www-form-urlencoded. Ensure the request body follows the required format. Avoid using other formats (such as JSON), as this may cause integration issues that are difficult to diagnose. |
| Request body | Value |
|---|---|
| grant_type | Must be authorization_code. |
| code | The unique authorization code sent via the query string to your redirect URL after the user grants permission (see Authorization is allowed). |
| redirect_uri | This redirect_uri must exactly match the one used in the initial authorization request. Any mismatch will result in a failed request. |
| code_verifier | This is the plain-text random string you used to create the code_challenge. Growave will hash it and compare it to the code_challenge from your initial authorization request to make sure they match. |
Keep your client secret private. Never expose it in the browser, as this risks your customers' data. Always use server-to-server requests. If you've lost your secret, please contact our team to request a new one.
The code example below shows how to use the authorization code from the redirect URL to request an access token.
- Python
@app.route('/oauth/callback')
def callback():
  # Get the authorization code from the query param
  authorization_code = request.args.get('code')

  # Retrieve code_verifier from database, cache or session
  code_verifier = pkce_data_storage.get(customer_id)

  # Exchange code for token
  headers = {
    'Authorization': get_basic_authorization_header(),
    'Content-Type': 'application/x-www-form-urlencoded'
  }
  data = {
    'grant_type': 'authorization_code',
    'code': authorization_code,
    'code_verifier': code_verifier,
    'redirect_uri': redirect_uri
  }

  response = requests.post(GROWAVE_TOKEN_URL, headers=headers, data=data)

  return '<pre>' + json.dumps(response.json(), indent=4) + '</pre>'
Access token considerations
- Access tokens and refresh tokens are 64 characters in length. Make sure your storage implementation can accommodate tokens of this size.
- Access tokens are valid for 24 hours. This value is fixed and does not change, so your integration should rely on the
expires_invalue returned by the/tokenendpoint.
Use the received access token
If your previous request is processed successfully, Growave will return a response similar to the one shown below:
| Key | Type | Description |
|---|---|---|
| access_token | string | An access token that you can use in the Authorization header when calling the Growave API. |
| token_type | string | How the access token is used: it is always a bearer token. |
| expires_in | int | The number of seconds the access token is valid. |
| refresh_token | string | This token allows you to request a new pair of tokens: an access token and a refresh token. |
| scope | string | The scopes granted to this access token, specifying which API resources it is allowed to access. |
If the request fails, the error codes returned are defined by the OAuth specification.
Once you have successfully obtained both the access token and the refresh token, you can begin making authenticated requests to the Growave API.
- cURL
curl --location 'https://api.growave.io/v2/reviews/getReviews?productId={productId}' \
  --header 'Authorization: Bearer {access_token}' \
  --header 'Accept: application/json'
Refreshing the Access Token
To ensure uninterrupted access to the Growave API, your integration should use the refresh token to obtain a new access token whenever the current one expires. Keep in mind that a token refresh may return a new refresh token, so you should always replace the previous one with the latest value provided, as the old refresh token is automatically revoked.
The process is the same as exchanging an authorization code, except that the request body contains a refresh token instead. Use the following Growave OAuth token endpoint:
https:///auth-service/v1/oauth/token
Structure your request with the request headers and body shown below:
| Request headers | Value |
|---|---|
| Authorization | Base64 encoded string that contains your client ID and client secret. The header must follow this format:Authorization: Basic <base64 encoded client_id:client_secret> |
| Content-Type | Set to application/x-www-form-urlencoded. Ensure the request body follows the required format. Avoid using other formats (such as JSON), as this may cause integration issues that are difficult to diagnose. |
| Request body | Value |
|---|---|
| grant_type | Must be refresh_token. |
| refresh_token | A valid refresh token. |
The code example below shows how your integration can use the refresh token to request a new access token when the current one expires.
- Python
def refresh_access_token():
  token_data = token_data_storage.get(customer_id)
  refresh_token = token_data.get_refresh_token();

  headers = {
    'Authorization': get_basic_authorization_header(),
    'Content-Type': 'application/x-www-form-urlencoded'
  }
  data = {
    'grant_type': 'refresh_token',
    'refresh_token': refresh_token
  }

  response = requests.post(GROWAVE_TOKEN_URL, headers=headers, data=data)

  # Update the tokens
  token_data_storage.update(customer_id, response.json())
Refresh token considerations
- Every time the refresh token is used, a new pair of access and refresh tokens is issued, and the previous tokens are revoked. The access token remains valid until it expires or is explicitly revoked via the
/revokeendpoint. - If the refresh token is invalid or revoked, the user must go through the authorization process again.
Revoke access and refresh tokens
When users disconnect your integration or delete their account, you should revoke their tokens immediately. This ensures that your application can no longer access their data and helps maintain user privacy and trust. Revoking a refresh token also automatically invalidates all associated access tokens for that user. Use the following endpoint:
https:///auth-service/v1/oauth/revoke
Structure your request with the request headers and body shown below:
| Request headers | Value |
|---|---|
| Authorization | Base64 encoded string that contains your client ID and client secret. The header must follow this format:Authorization: Basic <base64 encoded client_id:client_secret> |
| Content-Type | Set to application/x-www-form-urlencoded. Ensure the request body follows the required format. Avoid using other formats (such as JSON), as this may cause integration issues that are difficult to diagnose. |
| Request body | Value |
|---|---|
| token_type_hint | Must be access_token or refresh_token. |
| token | The access or refresh token to be revoked. |
The code example below shows how your integration can revoke both the refresh token and the access token.
- Python
def revoke_refresh_token():
  token_data = token_data_storage.get(customer_id)
  refresh_token = token_data.get_refresh_token();

  headers = {
    'Authorization': get_basic_authorization_header(),
    'Content-Type': 'application/x-www-form-urlencoded'
  }
  data = {
    'token_type_hint': 'refresh_token',
    'token': refresh_token
  }

  response = requests.post(GROWAVE_REVOKE_URL, headers=headers, data=data)
OAuth endpoints
| Endpoint | Description |
|---|---|
GET /auth-service/v1/oauth/authorize | Initiate the authorization process for the user in Growave |
GET /auth-service/v1/oauth/token | Obtain a new access token or refresh it using a refresh token |
GET /auth-service/v1/oauth/revoke | Revoke issued access and refresh tokens |
Available Scopes
| Scope | Description |
|---|---|
| read_customer | Provides read-only access to customer information, including contact details, loyalty data, and marketing preferences. |
| write_customer | Allows updating customer details, such as birthdays and loyalty point balances. |
| read_wishlist | Provides read-only access to wishlists, including lists, items, and product statuses. |
| write_wishlist | Allows managing wishlists by creating, updating, or deleting lists and items, including share links and item movements. |
| read_gift_registry | Provides read-only access to gift registry data, including registries, items, types, statuses, and shared lists. |
| write_gift_registry | Allows creating, updating, and deleting gift registries and items, including share links and draft orders. |
| read_review | Provides read-only access to reviews, review aggregates, review eligibility, and customer questions. |
| write_review | Allows creating reviews, replies, votes, questions, and answers, as well as managing their status. |
| read_gallery | Provides read-only access to galleries and related media, including product and gallery media items. |
| read_reward | Provides read-only access to loyalty rules, tier information, boost campaigns, and customer activity history. |
| write_reward | Allows sending reward events that update customer points or progress. |